




Natural granite is an igneous rock formed deep within the earth’s crust through the slow crystallization of molten magma under intense thermal and tectonic pressure. As a direct result of this geological origin, every quarried block possesses distinct physical characteristics, including multi-mineral crystal matrices, natural veining, and micro-fissures. While these inherent features give natural stone its aesthetic depth, they can also present hidden structural vulnerabilities, surface flaws, or processing anomalies.
Fabricating granite into architectural components, kitchen countertops, or heavy flooring slabs subjects the stone to substantial mechanical stress during diamond sawing, waterjet cutting, edge profiling, and crane transport. Identifying defects after sawing has commenced leads to irreversible material loss and costly project delays, particularly because wholesale stone distributors standardly refuse returns once a slab has been marked or cut. Conducting a complete pre-fabrication inspection is therefore an indispensable quality assurance protocol for stone fabricators, specifiers, and project managers.
Geological Integrity and Surface Flaw Evaluation
Distinguishing between natural geological formations and post-quarrying mechanical damage is fundamental to slab inspection. Conflating natural mineral boundaries with active structural fractures can lead either to the wasteful rejection of sound material or the catastrophic failure of a slab during shop processing.
Fissures versus Structural Cracks
A natural fissure is an inter-crystalline separation that developed during the original cooling and crystallization of the rock mass millions of years ago. Fissures typically track the natural grain, mineral banding, or flow lines of the granite and are frequently filled naturally with secondary minerals like quartz or calcite. When closed and mineralized, a fissure does not compromise the structural integrity or load-bearing capability of the slab.
In contrast, a structural crack is a mechanical fracture caused by external stress, such as quarry blasting shocks, rough transit, thermal shock, or improper yard storage. Cracks usually travel irregularly across mineral grains independent of the natural pattern of the stone. These separations represent active structural fractures that tend to propagate under the vibration of bridge saws and CNC routers.
| Evaluation Parameter | Geological Fissure | Structural Crack | Surface Pit or Inclusion |
|---|---|---|---|
| Origin | Magmatic cooling and tectonic compression during rock formation. | Post-formation mechanical shock, handling stress, or impact. | Plucking of mineral crystals (e.g., mica, biotite) during polishing. |
| Pattern Alignment | Follows natural mineral grain, veining, or crystalline flow lines. | Irregular; cuts perpendicularly across distinct mineral bands. | Localized surface voids or concentrated mineral clusters. |
| Surface Elevation | Surface remains completely flat and flush across the feature. | Displays a raised lip, offset ridge, or vertical plane shift. | Concave surface depression or localized void. |
| Light Behavior | Transmits light consistently when backlit. | Displays dark, irregular, non-translucent fracture edges under light. | Obstructs backlighting uniformly; reveals local resin fill. |
| Structural Stability | Stable if fully mineralized and closed. | Unstable; high probability of splitting during fabrication. | Low structural risk unless pits are concentrated or crumbling. |
Surface Pits and Mineral Inclusions
Pitting occurs when softer or micro-fractured mineral grains—most commonly biotite flakes or small mica crystals—are dislodged by diamond abrasive heads during surface polishing. The Natural Stone Institute classifies small, scattered surface pits as acceptable natural features rather than defects. However, dense clusters of deep pits can collect organic debris or water, necessitating factory epoxy treatment or shop-applied filler.
Mineral inclusions, often termed “knots” or “concentrations,” consist of localized groupings of dark or foreign minerals. Although sound inclusions are structurally benign, inclusions containing soft iron minerals like pyrite present long-term maintenance risks. Pyrite grains exposed to ambient atmospheric moisture can oxidize, triggering internal expansion and producing rust stains that bleed through the polished face.
Non-Destructive Field Testing Checks
Assessing a raw granite slab requires a structured testing sequence using accessible field diagnostic tools. Slabs should first be cleared of yard dust, surface water, and transit grime to ensure inspection accuracy.
Raking Light Illumination
Standard overhead lighting in storage yards often masks micro-cracks and surface plane irregularities. Inspectors should position a high-lumen LED beam nearly parallel to the stone surface, holding the light source 2 to 4 inches above the slab to cast a shallow angle across the face. This raking light technique casts distinct micro-shadows along subtle elevation changes, exposing vertical plane shifts, sunken resin fills, saw chatter marks, and uneven polishing that remain invisible under direct vertical light.
Tactile Examination and Feeler Gauge Diagnostics
Dragging a fingertip or fingernail across a suspect line provides immediate feedback regarding surface continuity. A fingernail slides smoothly across a closed, mineralized fissure, whereas an open crack catches the nail due to dip edges or height variations.
To evaluate open void dimensions precisely, inspectors can slide a 0.1 mm mechanical feeler gauge along the line. Penetration exceeding 1 to 2 mm indicates an open structural gap rather than a superficial surface line. Features accepting the gauge require structural epoxy injection prior to cutting or must be mapped outside of load-bearing sections.
Acoustic Resonance Testing
The acoustic tap test provides insight into internal density and structural continuity. By gently tapping the slab face with a knuckle or small hardwood mallet on both sides of a suspect line, inspectors evaluate the returned sound frequency:
Acoustic Sound Profile:
- Clear high-pitched ringing tone = Solid, continuous crystal matrix
- Dull, low-pitched thud (“dead” tone) = Internal delamination, void, or fracture
This acoustic method is especially definitive on standard 3 cm material. On thinner 2 cm material, reduced mass alters natural resonance, requiring comparison against known solid sections of the same slab.
Capillary Water Absorption Analysis
Water interacts differently with closed mineral veins compared to open fractures. Applying a bead of clean water across a suspect feature demonstrates this distinction.
On a mineralized fissure, surface water evaporates evenly, leaving uniform moisture boundaries. On an open structural crack, capillary action pulls water deep into the fracture channel. As the surface dries, the crack continues to hold water, displaying a dark, damp shadow long after the surrounding stone face has dried completely.
Backlighting and Ultraviolet Fluorescence Inspection
For semi-translucent granites or 2 cm slabs racked vertically, placing a strong light source behind the slab highlights internal fractures. Closed fissures transmit light continuously along their path, while open cracks create dark, jagged boundaries due to internal refraction gaps.
Inspecting the polished face under a 365 nm UV blacklight reveals concealed factory repairs. Epoxy and polyester resins used to patch surface flaws fluoresce under ultraviolet light, allowing fabricators to assess the total volume and placement of factory fills across the slab.
Chemical Authenticity and Dye Identification
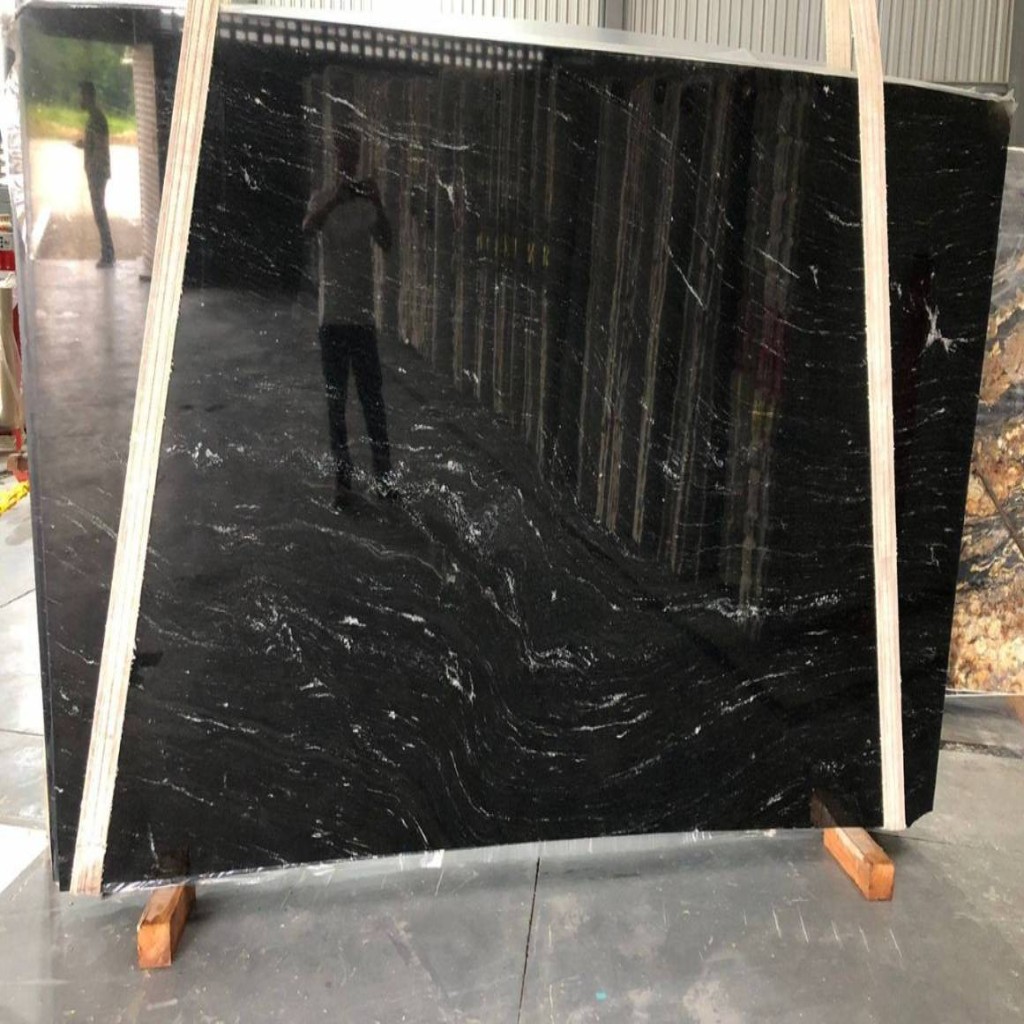
A persistent issue in natural stone distribution is the artificial enhancement of dark granites. Varieties like Absolute Black, Black Galaxy, and G20 Bengal Black are occasionally doctored with black dyes, carbon paste, or mineral oils to darken lighter gray base stone and market it as premium black granite. Over time, routine exposure to water, alkaline soaps, or mild acids strips these surface dyes, leaving blotchy gray patches that cannot be restored through standard polishing.
Solvent Extraction Check
To verify color authenticity, inspectors must perform a solvent extraction test before accepting dark granite slabs:
- Saturate a clean white cotton cloth with pure acetone or Methyl Ethyl Ketone (MEK).
- Apply firm pressure while rubbing a 4×4 inch area of the slab face or an unpolished edge for 60 seconds.
- Inspect the rag for pigment transfer.
If dark residue stains the cloth, the stone has been chemically dyed. Natural black granite retains its deep color exclusively through internal mineral density, leaving the white rag completely clean.
Acid Etch Testing for Mislabeled Stone
Granite is a siliceous rock composed mostly of quartz and feldspar, making it immune to etching from mild organic acids. However, certain soft calcareous stones, such as dark limestones or dolomites, are sometimes mislabeled and sold as black granite.
Applying a drop of 5% to 10% diluted hydrochloric acid (HCl) or concentrated lemon juice onto an unpolished section tests chemical resistance. True granite shows zero reaction. If the liquid bubbles, fizzes, or leaves a dull etched spot, the material contains calcium carbonate and will react poorly in kitchen or wet environment applications.
Dimensional Metrology and Calibration Tolerances
Even structurally sound granite will present installation problems if physical dimensions vary across the slab length. Modern seam-joining equipment and tight architectural tolerances require consistent slab geometry.
Slab Thickness Calibration
Fabricators should measure slab thickness using digital calipers at 4 to 6 perimeter points and across the center line.
- Industry standards established by the Natural Stone Institute mandate a thickness tolerance within ±1.5 mm (~ 1/16 inch) across a single slab.
- Total variance across the slab face should not exceed 1.0 – 1.3 mm.
Significant thickness tapers require extensive back-grinding or shimming during installation, increasing labor costs and risking seam misalignments.
Planar Bowing and Warpage
Slabs stored horizontally or leaned at steep angles in outdoor yards can develop permanent bows or warps. To evaluate planar alignment, inspectors place a 10-foot aluminum straightedge across the slab face horizontally, vertically, and diagonally.
The Natural Stone Institute limits maximum allowable planar deflection to 1/8 inch (3.1 mm) over a 10-foot span. Warped slabs introduce flexural stress when clamped to flat bridge saw tables, frequently snapping during automated blade passes.
Edge and Corner Integrity
Perimeter edges suffer severe mechanical impact during quarry extraction, gang-sawing, and container transport. Corners should be carefully checked for micro-cracks or deep fractures extending inward. Although outer margins are often trimmed during processing, perimeter cracks can expand into the slab core under high-speed blade vibration.
Factory Resining, Filler Integrity, and Mesh Backing
Modern stone processing routinely utilizes vacuum resin impregnation to stabilize micro-fissures and elevate surface gloss. While clear resining is an accepted industry standard, fabricators must evaluate resin quality prior to cutting.
Resining Quality Evaluation
Clear epoxy resins applied to natural fissures should match the light refractivity of surrounding quartz crystals. Slabs should be inspected for:
- UV Discoloration: Yellowed or cloudy resin lines caused by improper hardener ratios or outdoor UV exposure.
- Shrinkage Dips: Shallow surface depressions resulting from resin contraction during heat curing.
- Excessive Resin Pooling: Large resin fills exceeding 25 mm (~ 1 inch) in diameter indicate large structural voids, which can reduce structural integrity in load-bearing cutouts.
Fiberglass Mesh and Steel Reinforcement Inspection
Fragile 2 cm slabs and exotic granites are frequently reinforced with a fiberglass mesh backing bonded with resin. Fabricators must check for:
- Delamination: Peeling or bubbled mesh indicates inadequate resin adhesion, leaving the slab vulnerable during handling.
- Corroded Reinforcing Rods: Steel channels embedded in the slab back must be inspected for rust. Moisture penetration causes steel rods to oxidize and expand, generating internal force that splits the granite along the rod channel.
Structural Layout Mapping and Stress Concentration Management
Before making the initial cut, fabricators must map the proposed countertop template directly onto the slab surface. Analyzing stress distribution dictates where cutouts, seams, and cantilevered overhangs can be safely placed relative to inherent stone features.
High-Stress Concentration Zones
Sink cutouts, cooktop openings, and sharp corners represent primary stress concentration zones. Internal 90-degree square cuts create sharp focal points for flexural stress, making them prone to cracking under everyday thermal expansion or heavy loads.
Layout mapping guidelines:
- Cutouts for sinks and cooktops must maintain a minimum clearance of 50 mm (2 inches) from any open fissure or filled vein.
- Corner cutouts require a minimum internal radius of 19 mm (3/4 inch) to distribute mechanical stresses smoothly.
- Seams must not pass directly through open or heavily resined fissures, as joint adhesives bond poorly to pre-existing epoxy fills.
- Edge profiles with a minimum 3/4 inch radius or chip-minimizer bevels reduce impact damage from heavy cookware along sink rims.
| Feature or Flaw Condition | Risk Level | Prescribed Remediation |
|---|---|---|
| Tight, mineralized fissure far from cutouts | Low | No structural intervention required; note line position on shop drawings. |
| Tight fissure intersecting sink or cooktop corner | Medium | Pre-fill with low-viscosity clear epoxy; reinforce underside with fiberglass rodding. |
| Open fissure (0.5 mm-2.0 mm) in low-stress area | Medium | Vacuum-inject tinted epoxy; surface-buff flush; document repair for client approval. |
| Open fissure running directly along seam line | High | Shift template layout to reposition seam onto solid stone matrix. |
| Through-fissure spanning > 60% of slab width | Critical | Reject slab or repurpose for smaller vanity tops; request replacement from supplier. |
Pre-Fabrication Quality Assurance Checks
To ensure consistent quality control, stone fabricators should execute a systematic inspection process before loading any granite slab onto a bridge saw or CNC table:
- Clean the entire slab face thoroughly, removing all storage yard dust, mud, and water droplets that could mask surface flaws.
- Perform a raking light examination across the polished surface using a low-angle illumination source to detect subtle plane shifts, saw marks, or gloss inconsistencies.
- Execute tactile feeler gauge checks and acoustic tap testing along all visible veins or suspicious lines to distinguish stable fissures from open structural fractures.
- Test dark granites with an acetone-saturated white cloth to confirm the stone has not been artificially dyed or doctored.
- Verify chemical stone identity using dilute acid to ensure the material is true acid-resistant siliceous granite.
- Measure slab thickness at multiple perimeter points and across the center line using digital calipers to confirm variance remains within the maximum ±1.5 mm limit.
- Check planar flatness with a 10-foot straightedge to ensure total bowing does not exceed the 3.1 mm(1/8 inch) deflection threshold.
- Inspect the reverse face to confirm fiberglass mesh adhesion, evaluate factory resin fills for UV yellowing, and check embedded steel rods for rust.
- Mark all natural features with soapstone and position template cutouts, sink corners, and seams at safe distances from structural stress points.

Leave a Reply